Hey everyone, I hope you’re having an incredible day today. Today, I’m gonna show you how to prepare a special dish, homemade cultured butter. One of my favorites food recipes. For mine, I’m gonna make it a bit unique. This will be really delicious.
Preparation Whisk cream and buttermilk in a large bowl. Cover loosely with plastic and let sit at room temperature until thickened and tastes tangy. Homemade cultured butter is rich, silky, creamy with a fresh, tangy twist.
Homemade Cultured Butter is one of the most well liked of current trending foods on earth. It’s appreciated by millions every day. It is easy, it is quick, it tastes yummy. They’re fine and they look wonderful. Homemade Cultured Butter is something that I’ve loved my entire life.
To get started with this particular recipe, we must prepare a few components. You can have homemade cultured butter using 4 ingredients and 7 steps. Here is how you can achieve it.
The ingredients needed to make Homemade Cultured Butter:
- Get 1 kg Heavy Whipping Cream Preferably Organic & Grass-Fed,
- Get 150 g Live Cultured Yogurt Preferably Organic,
- Make ready Pink Himalayan Salt, 1.7%
- Make ready Pinch Nori Flakes,
At some point, every from-scratch-loving homesteader decides it's time to learn how to. Homemade cultured butter is easy to make: all you need is heavy cream, yogurt, and sea salt. As is abundantly obvious to anyone with the slightest acquaintance with my medical records, I've never met. Homemade cultured butter has a rich, glossy texture that's silky, not waxy.
Steps to make Homemade Cultured Butter:
- In a large bowl, add cream and yogurt. - - Mix until well combined. - - Cover loosely with cling film. - - Set aside, at room temperature, in a cool and dry place for 24 to 48 hrs.
- The timing may vary from climate to climate. I am residing in a very humid environment. It took me about 36 hrs.* - - The mixture should be thick, whipped cream consistency. - - Using a hand or stand mixer, whip until the milk solids separate from the buttermilk. - - Place a large sieve over a bowl.
- Place a cheesecloth over the sieve. - - Transfer the mixture onto the cheesecloth. - - Wrap and set aside to drip for about 1 hr. - - Give it a light squeeze.
- You can use the buttermilk for cooking or baking.* I usually use buttermilk to make buttermilk pancakes for my daughters. - - Prepare 2 bowls of iced water. - - Transfer the butter into one of the bowls. - - Wash the butter.
- Once the water becomes too cloudy, transfer the butter into the other bowl. - - Continue washing and kneading until the water runs clear, switching back and forth between bowls of clean iced water. - - Measure out the butter.
- Take the weight multiply by 1.7. - - That is the weight of salt that you are gonna add. - - Add in some nori flakes. - - Fold and mix until well combined.
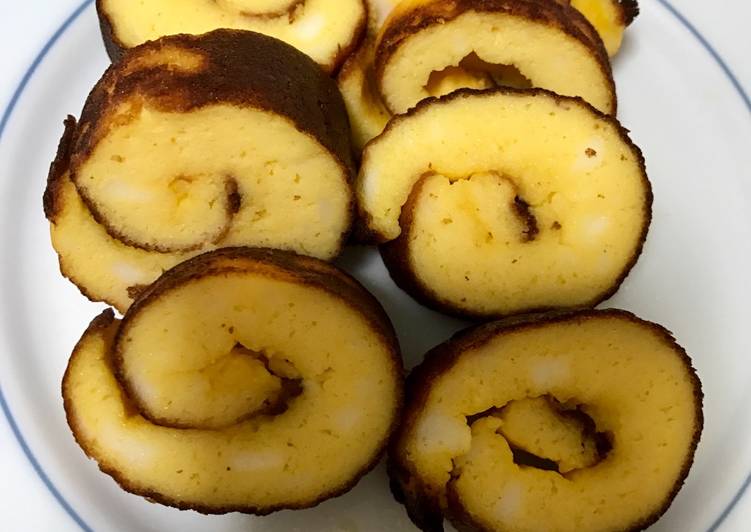
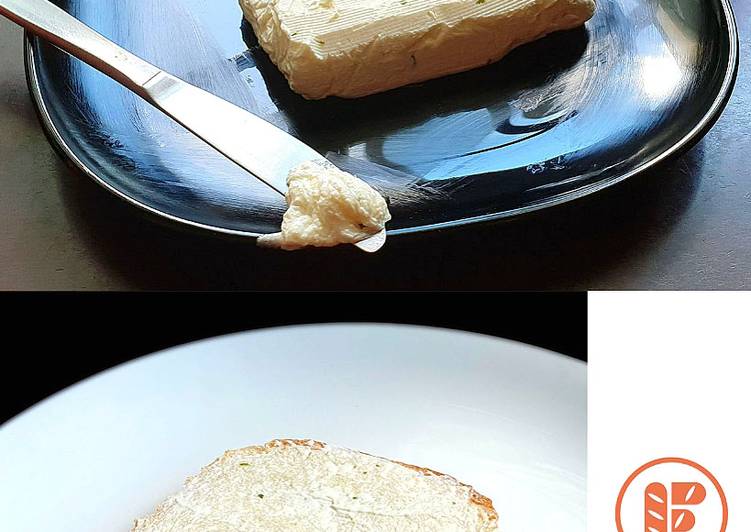
- You can transfer the butter onto a cling film and roll it tightly into a log; I am just using a loaf pan lined with cling film. - - Make sure the butter is packed compactly. - - Keep it chilled in the fridge overnight. - - The butter should be hardened. - - Spread it on some toast and enjoy.
But it's not just about texture. Unlike most supermarket brands of butter, homemade cultured butter has noticeable flavor. Healthy low-carb, keto and paleo recipes plus free guides and diet plans to help you achieve your goals on the ketogenic diet. Traditionally, cultured butter is made by collecting the. Have you ever wanted to make your own butter?
So that is going to wrap this up with this exceptional food homemade cultured butter recipe. Thank you very much for reading. I’m confident that you will make this at home. There is gonna be interesting food at home recipes coming up. Don’t forget to save this page on your browser, and share it to your loved ones, colleague and friends. Thanks again for reading. Go on get cooking!